
Pepper mills are well used utensils in our kitchen. We have a couple on the counter by the stove area and one on the kitchen table. These are of the plastic (yechh!) variety and my wife and I felt, (well, actually she did) that they should be replaced. I mean, after all… 🙂
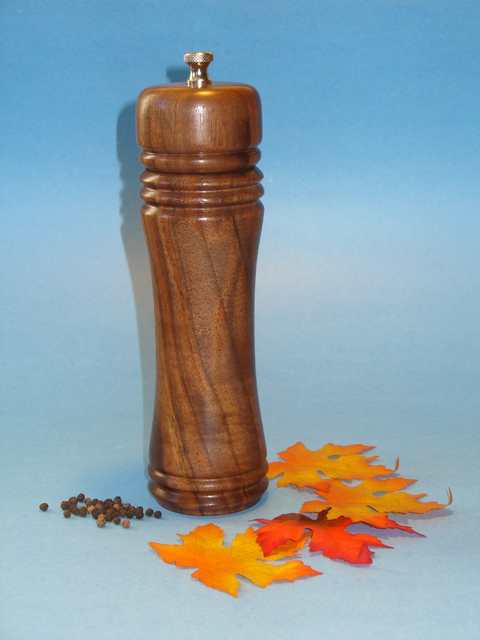
This one stands just over 8″ tall, made of Walnut and it is finished with Shellawax. It feels comfortable in the hand for both my wife and I and makes an nice addition to our home.
The class was taught by Stephen Zwerling, whom I had taken several seminars with before including my Beginning Woodturning Course a year ago (the one that started it all! :)). Stephen is a founding member of the Nova Woodturner’s Guild and a professional woodturner. He creates both functional and decorative wood turnings including bowls and thin-walled vessels and, of course, pepper mills.
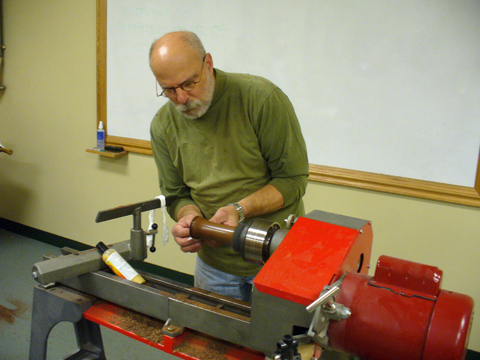
The class began with Stephen speaking on design and the different options available to make a unique and pleasing looking pepper mill. This was followed by a full demonstration of the turning process from start to finish. This let us know the steps involved and the sequence to do them in. This was very important since several steps required drilling and rechucking.
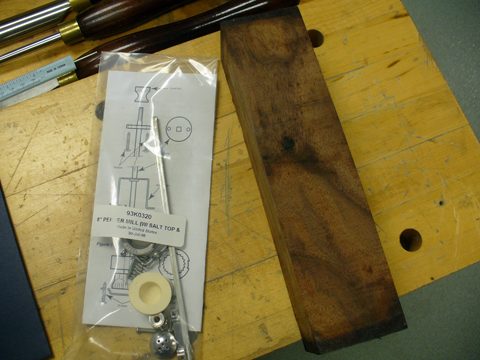
We were using the 8″ Pepper Mill Mechanism (93K03.20) and a block of Walnut 2 1/2″ square and 10″ long (41B14.10) from Lee Valley.
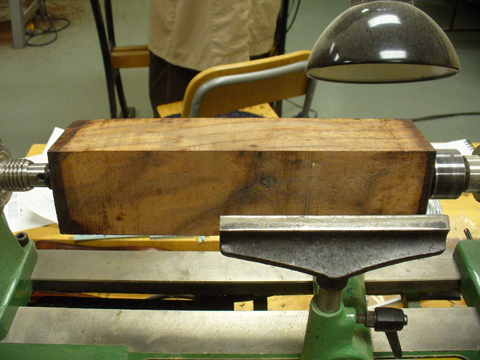
The first step was to mount the wood between centers and turn a rough cylinder and then turn a tenon at one end. Since the end with the tenon was to be the top of the pepper mill care was taken to choose the desired grain pattern and orient the tenon accordingly:
Once this was done the cylinder tenon was mounted in the chuck. The tailstock was once again added to give more stability while turning.
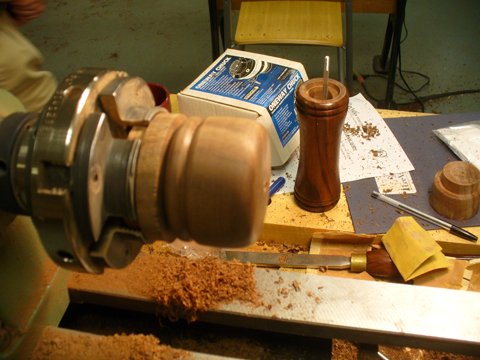
Next, the bottom of the pepper mill bottom was turned. This included both the outside and inside:
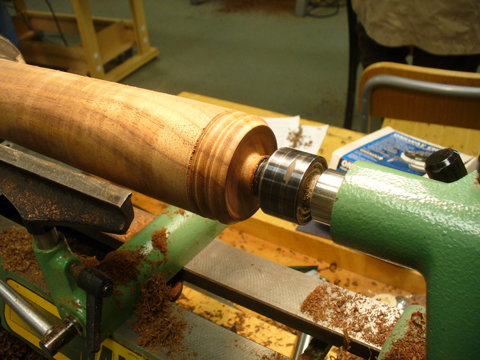
It is only after this that the length of the pepper mill bottom can be determined. This is to ensure that if there is a problem creating the bottom you will have plenty of wood to redo it. I chose approximately 6 1/2″ for the size of the mill bottom.
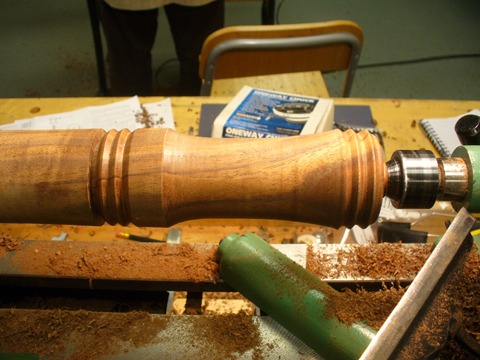
Once I was happy with the bottom of the bottom I measured it, marked it and then parted the cylinder to a depth that allowed me to easily work the top of the bottom. I also shaped the rest of the bottom at this time:
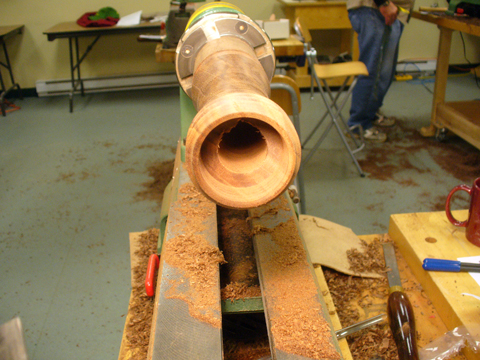
Once the shaping of the bottom was done the tailstock was removed and the final turning of the bottom of the bottom was done. Then the hole that that would house the grinder mechanism and the peppercorns were drilled. Here you can see both including where the drill bit went ‘slightly’ astray (which didn’t pose a problem because the grinder mechanism covered it):
At this point the bottom was sanded and the finish was applied:
The bottom was then parted off and work began on the top, starting with turning a tenon that would fit into the hole at the top of the bottom. Once this was done the top was measured to bring the overall length of the pepper mill to approximately 8″. A parting cut was made a bit longer to give room to shape the top. It was then shaped and parted off.
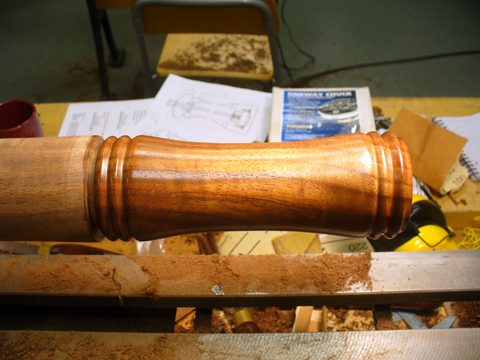
Then a jam chuck was turned and the top was reverse jammed for final finishing:
Once the top was shaped it was sanded and the finish applied. Then the mechanism was installed and voila!, a woodturned pepper mill!
I’m looking forward to doing more pepper mills but I will have to wait. For accuracy when boring the hole the combination of the wood length and the length of the drill bit requires a full size lathe (hint, hint).
This was a great project and it wasn’t a particularly hard one to do (though it had its moments!) but as I mentioned in the past, the real big benefit that I get from these hands-on seminars is that they get me to do the project and the confidence to do more. There are so many projects that I want to do but never get around to, either because of the perceived lack of time or just because of a hesitancy to take on a new challenge. These classes make you allot the time and really take out the guess work!
Likewise, there is always something to be learned. Regardless of the project I always pick up a nugget or two and when the instructor is at the caliber of Stephen Zwerling I can always guarantee that I’ll come home with a bagful!
Thanks to Lee Valley and especially seminar coordinator Scott Croucher for another great one! It’s always an enjoyable learning experience!
Special thanks to Stephen for sharing his experience and knowledge and for making a great class a fantastic one. Kudos!
Back to the shop…
Frank
Hi,
I’m about to start making manufactured pepper mills and your post was encouraging, so thanks!
Can you tell me where to buy the mill mechanism?
Cheers,
Woodworker's Guide
Thanks, Frank, can’t wait to see them! You can find some sources for the mechanisms here in the Woodturning Supplies section of the Link Directory.