
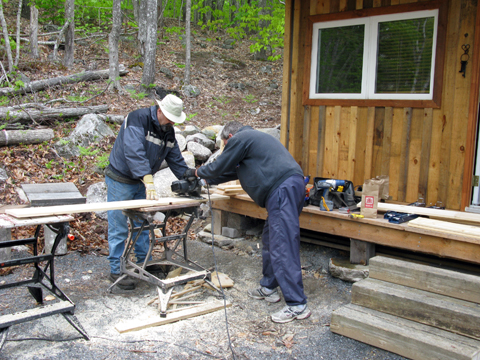
We all spent the day building these for their lake front cottage and it couldn’t have been a better day. Though it rained a bit on and off throughout the day the bunk bed construction went slick as a whistle.
Before starting we did up a cut list and a step-by-step plan which, amazingly, could not have worked out better. Here it is:
Purchase Order
12 – 1” X 6” X 8’
2 – 1” X 8” X 12’
3 – 1” X 8”X 8’
2 – 1” X 8” X 10’
6 – 2” X 2” X 8’
1 – 1” X 4” X 8’
1 – 2” X 4” X 10’
Cut List
The pieces below are cut from the following by matching the numbers that are in brackets:
12 – 1” X 6” X 8’ (1) (2)
2 – 1” X 8” X 12’ (3a)
3 – 1” X 8”X 8’ (3b) (4b)
2 – 1” X 8” X 10’ (4a)
6 – 2” X 2” X 8’ (5)
1 – 1” X 4” X 8’ (6)
1 – 2” X 4” X 10’ (7)
Bunk beds:
8 – 1” X 6” X 72” (1)
4 – 1” X 6” X 14” (2)
4 – 1” X 6” X 32” (2)
4 – 1” X 8” X 76” (3a) (3b)
4 – 1” X 8” X 38 ½” (4a) (4b)
4 – 2” X 2” X 74” (5)
1 – 1” X 4” X 76” (6)
3 – 2” X 4” X 40” (7)
Queen-size bed:
8 – 1” X 6” X 24” (1)
4 – 1” X 6” X 16” (2)
2 – 1” X 8” X 81” (4a)
2 – 1” X 8” X 60 ½” (3a)
2 – 2” X 2” X 79” (5)
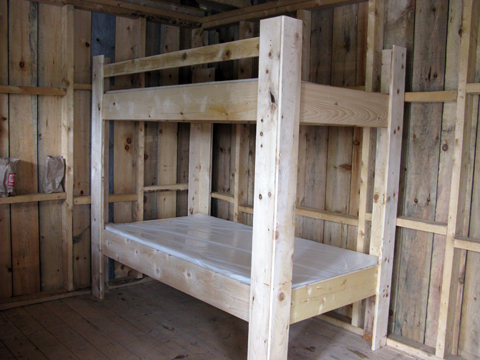
Bunk Bed Construction
01. Cut 8 pieces of 1″ X 6″ to 72″ for bunk bed legs. (Router 2 same-side edges of 4 pieces of the legs for outside pieces and router 1 edge of 4 pieces to be used for the end pieces)
02. Countersink and drill screw holes 1′ apart and secure the 2 pieces together on edge with 1 1/2″ screws
03. Cut 4 pieces of 1″ X 6″ to 14″ for the bottom bed frame supports (router 1 edge before cutting)
04. Countersink and drill 4 screw holes in each piece and secure to bottom of the 4 legs
05. Cut 4 pieces of 1″ X 6″ to 32″ for top bed frame supports (router 1 edge before cutting)
06. Countersink and drill 6 screw holes in each piece and secure to the 4 legs at distance from bottom support plus the width of the bed side
07. Cut 4 pieces of 1″ X 8″ X 76″ for both bunk bed sides and router outside of top edge
08. Cut 4 pieces of 1″ X 8″ X 38 1/2″ for both bunk bed ends and router outside of top edge
09. Countersink and drill 3 screw holes in the end of each bed side and secure to the edge of the bed ends with glue and screws
10. Attach the bottom bed frame to the legs by fitting it between the bottom and top supports and countersinking and drilling 4 screw holes in both sides and then securing.
11. Attach the top bed frame to the legs by fitting it on the top support and countersinking and drilling 4 screw holes in both sides and then securing.
12. Cut 4 pieces of 2″ X 2″ X 74″ for mattress slat hanger rails
13. Attach mattress slat hanger rails to the bed sides 4″ from top by countersinking and drilling screw holes 1′ apart from outside of bed side
14. Cut mattress slats to size and countersink and drill 1 screw hole in each end and secure to mattress slat hanger rails. Additionally, countersink and drill 2 screw holes in the outside of the bed end and secure to the end slats
15. Cut 1 piece of 1″ X 4″ X 76″ for top railing and attach to the inside top of the outside legs by countersinking and drilling 2 screw holes on each end and securing
16. Cut 3 pieces of 2″ X 4″ X 40″ for ladder (router 1 edge before cutting). Attach to the end of the bunk by countersinking and drilling 2 screw holes in each end and secure by starting at the height of the top of the bottom bunk and then spacing 10″ between
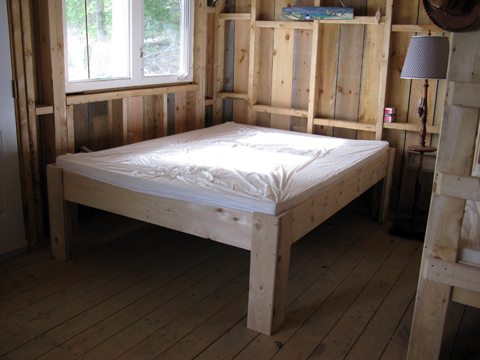
Queen-size Bed Construction
01. Cut 8 pieces of 1″ X 6″ to 24″ for master bed legs. (Router 2 same-side edges of 4 pieces of the legs
for outside pieces and router 1 edge of 4 pieces to be used for the end pieces)
02. Countersink and drill screw holes 6” apart and secure the 2 pieces together on edge with 1 1/2″ screws
03. Cut 4 pieces of 1″ X 6″ to 16″ for the bed frame supports (router 1 edge before cutting)
04. Countersink and drill 6 screw holes in each piece and secure to bottom of the 4 legs
05. Cut 2 pieces of 1″ X 8″ X 81″ for both bunk bed sides and router both sides of top edge
06. Cut 2 pieces of 1″ X 8″ X 60 1/2″ for both bunk bed ends and router both sides of top edge
07. Countersink and drill 3 screw holes in the end of each bed side and secure to the edge of the bed ends with glue and screws
08. Attach the bed frame to the legs by fitting it on top of the bed frame supports and countersinking and drilling 4 screw holes in both sides and then securing.
09. Cut 2 pieces of 2″ X 2″ X 79″ for mattress slat hanger rails
10. Attach mattress slat hanger rails to the bed sides 4″ from top by countersinking and drilling screw holes 1′ apart from outside of bed side
11. Cut mattress slats to size and countersink and drill 1 screw hole in each end and secure to mattress slat hanger rails. Additionally, countersink and drill 2 screw holes in the outside of the bed end and secure to the end slats
The only thing that was overlooked was the possible need for a 2 X 4 or 2 X 6 stringer to run down the center of the bed to minimize any sagging caused by the length of span.
Here’s a few more photos:
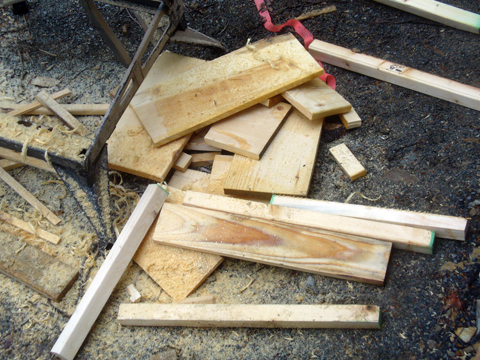
And here’s the small amount of wood that was left over:
This was a very rewarding project on several levels. We had a great day together and got an excellent project finished. More importantly, they were quite happy to have these made. As D’s sister said, “They’re the best!” What more could one ask for?
Back to the shop…