
If you are not aware, a zero clearance insert’s saw blade opening is cut to the exact width of the saw blade’s kerf. This helps prevent thin slices of wood from jamming in between the blade and the insert, as well as helps to reduce the amount of tear-out that can happen with the stock insert that comes with your table saw.
Being able to cut thin strips of wood safely and minimizing tear-out are enough reasons to install one of these throat plates on your saw. While we use the term, ‘minimizing’ in reference to tear-out this is only to err on the positive side of a statement. Our own experience has shown that tear-out is virtually eliminated.
You may wonder why a zero clearance throat plate isn’t a stock item on your table saw but this is because a wider opening is required for different blade angle cuts, and since a zero clearance insert is not required for most general construction use the added cost for including an additional throat plate would be cost prohibitive.
But this is really no problem because making your own zero clearance throat plate/insert is such a simple process that you’ll be surprised that you didn’t make one sooner. 😉 Let us tell you how we made ours:
First, since our stock insert was approximately 1/2″ we used 1/2″ (12mm) Baltic Birch plywood to make ours. You can also use MDF, counter laminate or similar. Just make sure that you use the same thickness as your stock insert.
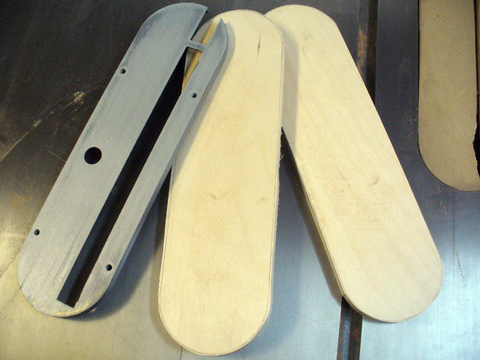
We traced the stock insert on to some plywood and then rough cut it out on the bandsaw. Since they’re so easy to make we always make a couple at a time. Here’s the stock metal insert and two cutouts:
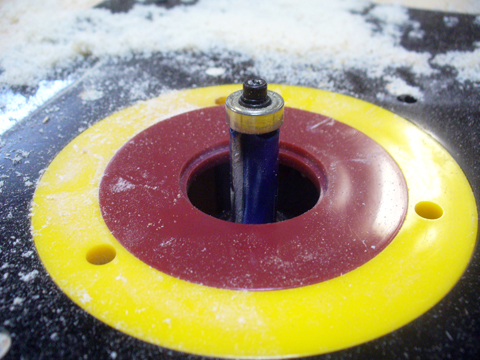
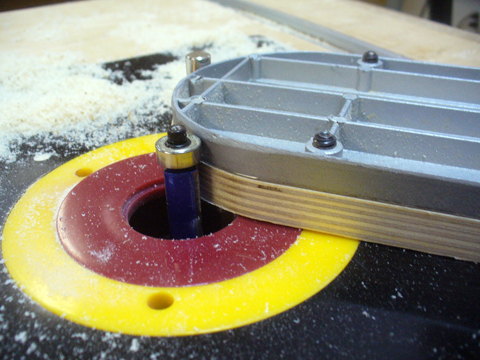
Next, using double-sided tape we stuck the stock insert to the cutout and then using a flush trim bit mounted in our router table we trimmed the edges of the cutout:
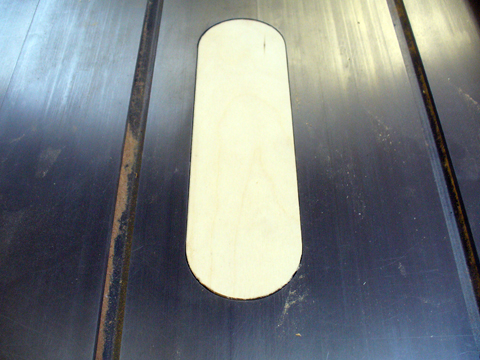
This ensured that the cutout fit perfectly in the table saw throat opening:
Next, using our drill press and a 1/2″ Forstner bit we drilled a hole in the insert so that we can stick our finger in it to easily remove the insert from the throat opening, something we should have done BEFORE fitting it in the throat opening. 🙂
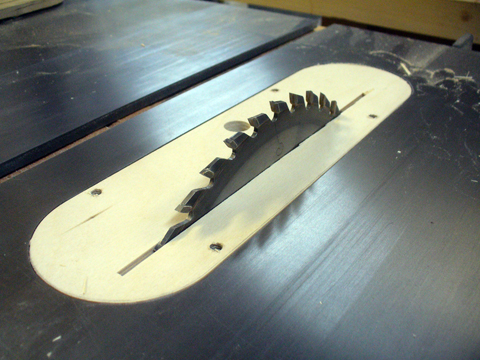
Then it was time to cut the slot for the saw blade and this is done by raising the blade up while the table saw is running and thereby cutting through the insert.
Since our table saw doesn’t allow the saw blade to be fully retracted so that it sits below the insert we changed the blade to a dado blade. Dado blades are usually only 8″ in diameter instead of the 10″ of the regular cutting blade.
With the blade fully retracted and the insert in the throat opening we slid the table saw fence over the edge of the insert and tightened it. I was very careful not to bring it close to or over the blade. We could have also use a couple of boards across both sides of the insert clamped to the table’s edge.

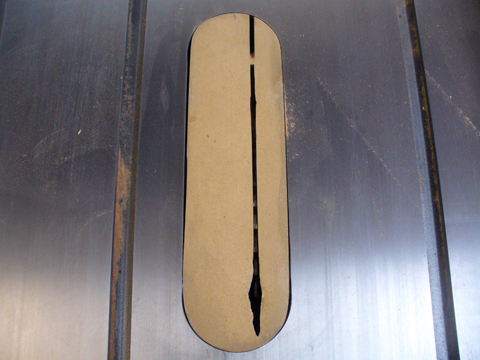
We turned on the table saw and then slowly brought the blade up, creating the saw blade slot:
We then changed back to my regular blade at this time and completed the cut.
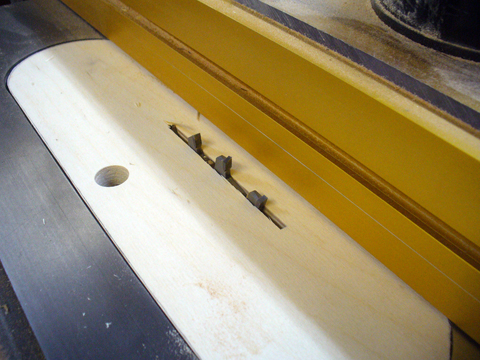
Next, we drilled four small holes to fit screw inserts, or insert nuts, into and then screwed them in. These are used to level the new throat plate:
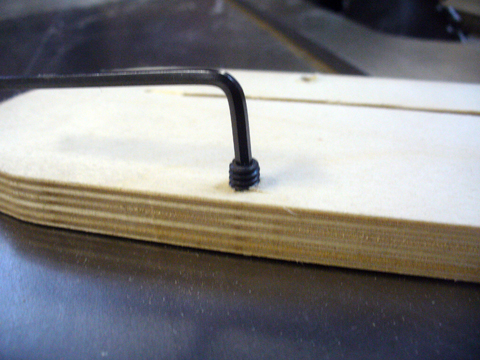
Place the throat plate in the opening, adjust to level and you’re done. That’s all there is to it!
The only thing that’s really left to do is to cut a slot in the back edge of the insert to accommodate our blade guard. To do this we just raise the right edge of the insert a bit and bring the fence up to it. Then we place the old insert in the throat opening and cut the slot by guiding the new insert along the fence. This ensures that it is place in line with the blade.
Oh, by the way, here’s our old insert. Yep, pretty terrible. It’s obvious that we needed to do this for some time. 🙂
We also make these zero-clearance inserts for dado blades as well, though we don’t make them for all width sizes until we need them. By making up several blanks at one time allows us to have them on hand for whenever we need one for a new dado width that we require.
If you plan on making your own zero-clearance throat plate just be careful when raising the blade to cut the slot. Ensure that the fence is not near the blade and that it holds the insert securely. Also remember that you can use a couple of boards clamped to the table instead of your fence. Most importantly, remember safety first! If you don’t feel comfortable about doing this part – don’t! 🙂
This really is a simple project and one that will reward you with a safer working environment and better quality cuts.
Back to the shop…
Chris Williams
Fantastic! Just bought the new Delta 36-725 table saw and there are no accessories for it yet. I have some jobs that needed a dado so this was a big help. Thanks!
Steve
Excellent job of explaining your process. Thank you for this very useful information.