
A spindle steady is used to steady a long spindle while turning. The smaller the diameter and the longer the spindle is the more likely it is to vibrate and ‘whip’ back and forth, making it pretty much impossible to turn. The spindle steady, using clamping pressure with a series of wheels, tames this erratic motion allowing you to turn your piece as normal. Basically it minimizes the distance of support on your workpiece.
Making your own steady rest is rather straight forward and easily finished in a day, though an afternoon and a few hours the following morning is preferred since this will give time for the glued pieces to dry.
Here’s how we built ours:
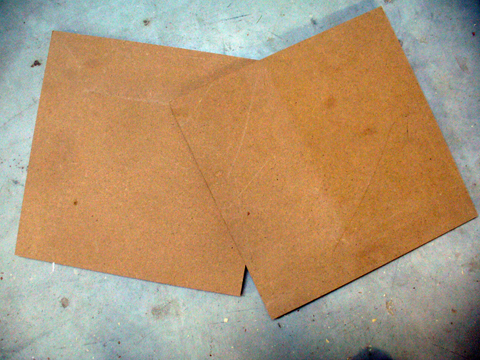
We started with two pieces of 3/4″ MDF cut to 16″ square. The size in your case may differ, depending on the swing-over bed capacity of your lathe.
Next, we found the center of each of these pieces.
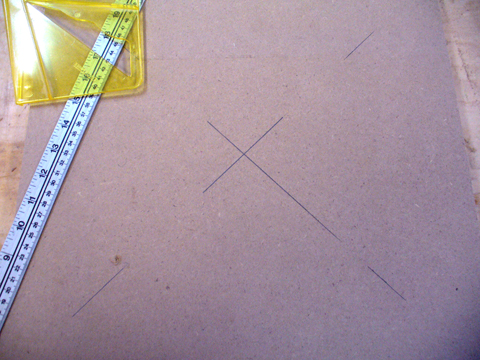
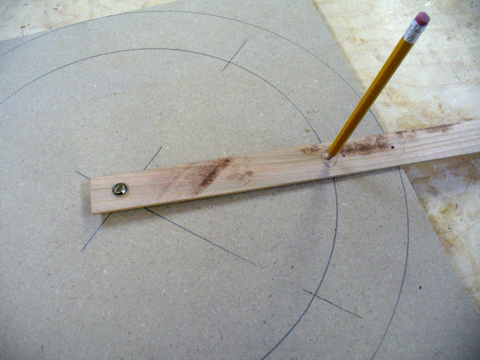
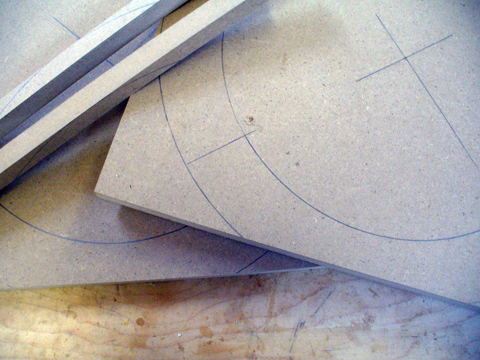
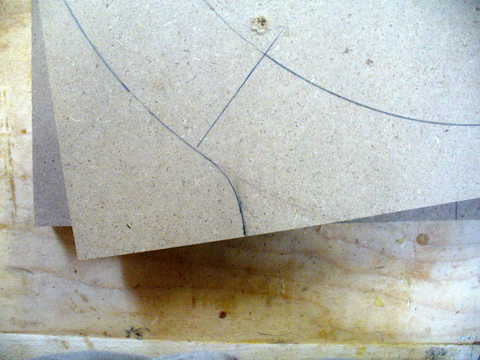
Then we made two concentric circles, one at the maximum diameter and the second one 2″ smaller. We didn’t have a traditional compass large enough so we just made a simple beam compass that consisted of a thin strip of wood, a tack and two small holes for trammel points that a pencil point fit through, which you can see here:
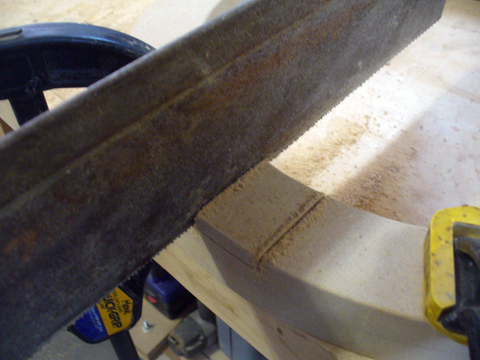
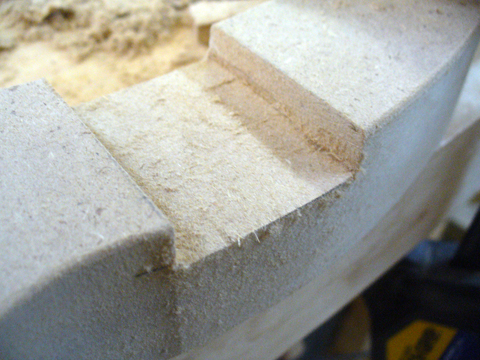
Next we cut a 3/4″ strip off one of the sides of each of the squares. This side will become the bottom and removing this strip will allow for the 3/4″ base that will be put on later.
Then, using an appropriate size circle (a large washer) we traced in a line that blended the outer circle into the bottom.
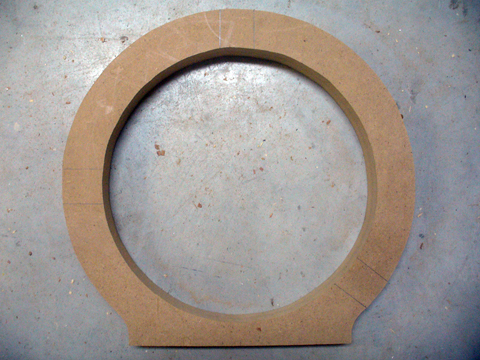
Next, using a jigsaw we cut out each of the rings. When doing this we started the jigsaw with a hole large enough for the jigsaw blade as near to the ring as we could since we would be using one of the centers for the base.
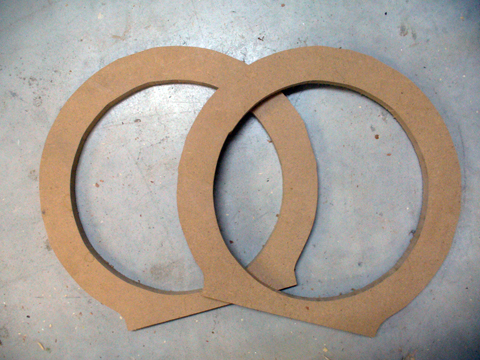
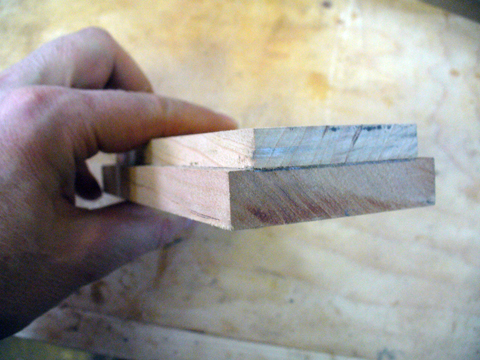
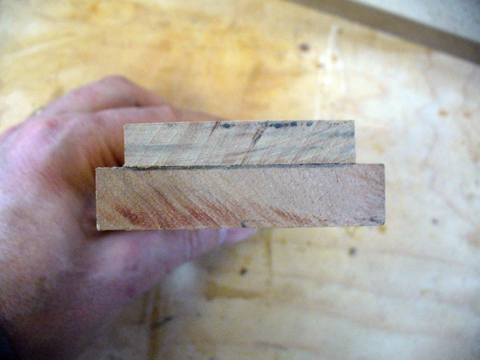
Once this was done we glued the pieces together and clamped it well:

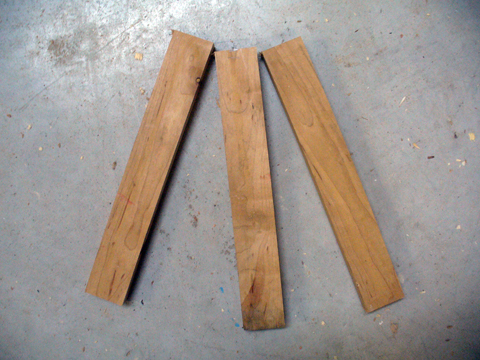
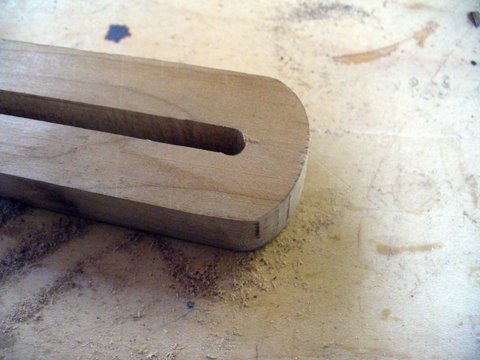
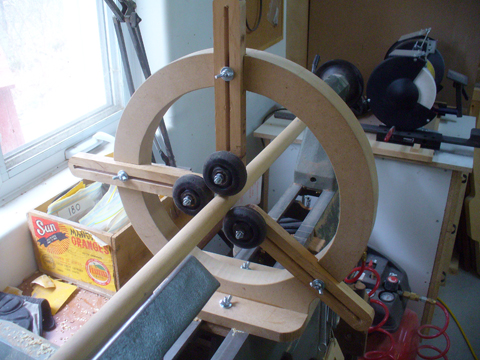
While this was drying we cut 3 pieces of hardwood at 3/4″ X 1 1/2″ X 10″ for the wheel adjustment arms.
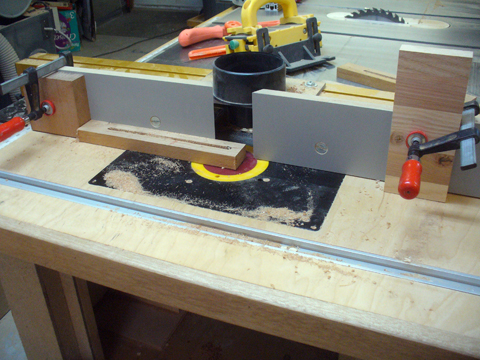
To make the slot in the arms we used a 1/4″ spiral bit in the router and set up two stop blocks on the router table fence to only allow the wood to travel the distances for the slot, which was 2″ from one end and 1″ from the other.
Then we rounded both ends on the bandsaw:
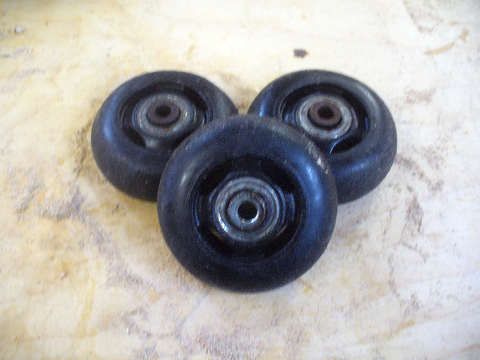
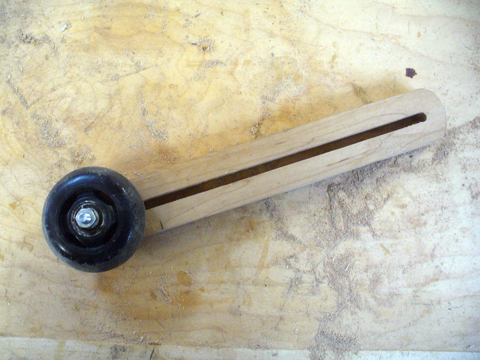
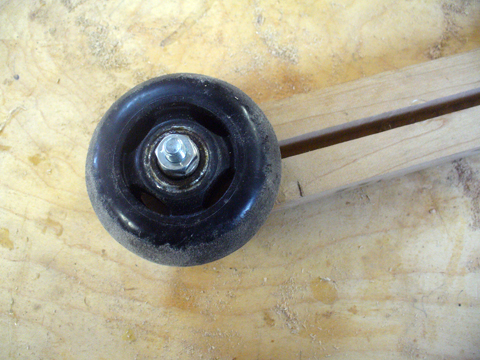
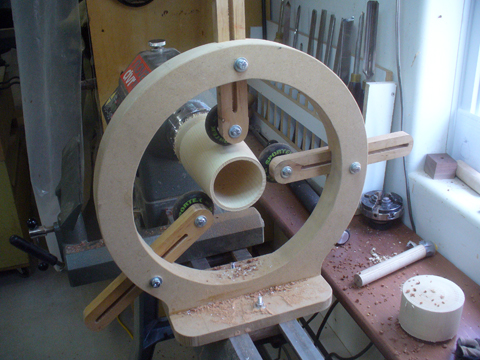
Then, on the end of each of the slider arms where we left the 2″ of unslotted wood, we drilled a hole and then bolted on a rubber wheel that we took off an old pair of roller blades.

Next, we cut a 6″ X 10″ piece from one of the ring centers for the base and rounded the corners and sanded off the sharp edges.
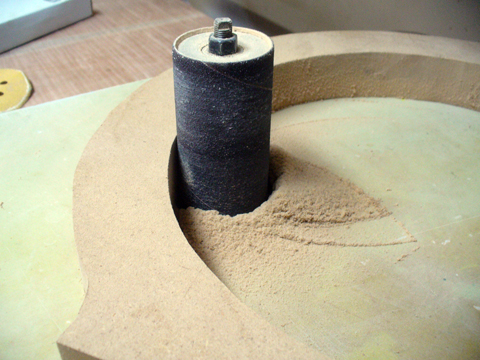
Once the ring was dried we sanded it a bit with an oscillating spindle sander, truing up the two pieces.
Once this was done, and the sharp edges rounded a bit, we marked where we wanted the sliding arms to go. We determined the positions for these by laying the ring on my workbench and then placed the remaining center piece back in the center of the ring. This gave me a center point again. Then we arranged the sliding arms so that the wheels would meet in the center and then traced the width of the arm on the ring.
We wanted very little movement between the arm and the ring, just enough to allow them to slide, so we cut tight to the drawn line. We also cut to about a 3/8″ depth. We cleared away the waste with a bench chisel.
We drilled the holes for the bolts that would hold the arms and added the base with a couple of screws and some glue.
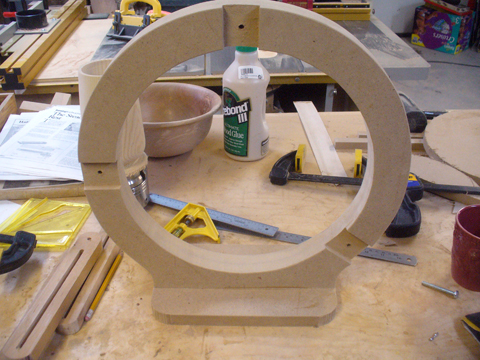
Next, we made the pinch bracket out of a couple of pieces of scrap hardwood. The pinch bracket is what holds the steady rest on to the lathe bed so this had to be sized for the distance between the ways and to allow clamping pressure when the base bolts are tightened.
Then it was just a matter of drilling a couple of holes in the base, matching them up with holes in the pinch bracket and adding the hardware.
Installing the sliding arms on the spindle steady completed the project which gave me 12″ maximum diameter:
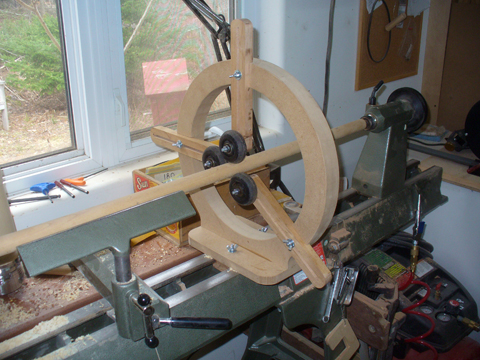
As you can see this is quite an easy project and one that can be pretty inexpensive. We were fortunate enough to have everything we needed except for a few wingnuts. Probably the hardest thing to get would be the wheels but these can be picked up at yard sales and flea markets pretty cheap.
Here’s a list of what we used:
2 pieces of 3/4″ X 16″ square MDF (for the rings and base)
3 pieces of 3/4″ X 1 1/2″ X 10″ hardwood (for the slider arms)
2 pieces of approx. 3/8″ X 3″ X 6″ hardwood for (the pinch bracket)
3 roller blade wheels
5 – 2 1/4″ X 1/4″ bolts (for slider arms and base assembly)
5 – 1/4″ wingnuts
5 – 1/4″ lock washers
3 – 2″ X 1/4″ bolts (for the wheel assembly)
3 – 1/4″ nuts (for the wheel assembly)
3 – 1/4″ washers (for between wheels and arm)
If we were to build another one we would place the sliding arms at an equal distance around the ring. In this version we wanted one that would be located behind my turning, giving support when force was applied with a tool. Doing so would have placed one of the arms in an awkward place (so we thought) and we would have been prone to bumping into it so we placed it straight at the top. The problem with this configuration is that when working on a very small spindle the top and back wheels can touch, causing them to reverse on each other. Now, although this is easily remedied by simply reversing either the top or back sliding arms it made for an unnecessary solution since we later found that had we placed the top one at an equal distance around the ring it would not have been in our way after all. 🙂
Another change we would make is to design one that had an opening in the ring that will allow you to install the steady rest without having to remove the tailstock. This would be a lot more convenient.
Update – 04/08/12: We see that Lee Valley is now stocking Polyurethane Wheels, originally used for kick scooters, that would work very well for this project if you don’t have access to roller blade wheels. At only a couple of bucks each they look to be a great deal. Find out more here.
Back to the shop…
Tracy
I used your basic design and made one of these for my mini lathe since it would not accept a standard steady rest without grinding at least 1/4″ off the tool. I found the skates for $2.14, harvested the wheels and had just enough wing nuts to do the job. Thanks for the great idea!
Louis
Thank you so much for taking the time and illustrating the whole process. I built your steady rest and it works flawlessly. I am very happy with finding your post. The rest enables me to do much more on the lathe.
ed
this is great! thanks for sharing. curious though, do the wheels ever leave any marks/streaks on the piece you are working?
Woodworker's Guide
Ed, no they don’t. However, they did when I first used them, I guess because they had ‘road residue’ on them. It was easily sanded off the piece. btw, check out the update I made above – Lee Valley now sells wheels that would be perfect for this project.
john swift
hello i’m just looking at the plans for your steady rest i must say it looks very impressive and i am going to make one. the question i have is what is the swing over your lathe bed to accomodate the 16″ circle my lathe is a powermatic with a 20″ capacity over the bed
many thanks john.
Woodworker's Guide
John, my lathe has a 16″ swing. You will have to adapt the plans to make a 20″ one for your lathe. Let me know how you make out with it.
Jacques Thuot
Thanks for sharing that ides. Tanks for the drawing too !! It’s great
des
Hi,we are about to make a lathe steady,we were going to use four wheels from each corner as ours is square on it’s outside edge,I notice you have three wheels is this done for a reason ? as yet we could still use three instead of four as we have not cut the slots for the sliders.Great plans you have and we will be copying the fixing to the lathe bed cheers,Des
Woodworker's Guide
Des, a fourth wheel is just not needed. Using 3 at equal, or near equal, distance around the perimeter gives equal pressure on the turning. However, I have seen some configurations with square frames so I see no reason why four wouldn’t also work.
Rick Murton
I just completed the project and the instruction where great. I have one suggestion that might help everyone and that is to use carrage bolts for the pinch brackets, that way you don’t need to use a wrench to tighten the bracket to hold the steady rest in place.
Woodworker's Guide
Awesome, Rick! Glad it helped. Thanks for the tip.
Harry
I completed your design for a 3 point steady december last year and it has come in very useful, excellent design. The only variation i used bog standard roller bearings and they work fine. It is possible to make a steady with an adjustable screw through the body to enable you to put gradual pressure on the bearings but this would be more complicated to make. Thanks for your idea.
Woodworker's Guide
Harry, great, glad that I could help!
Woodworker's Guide
Mark, awesome! Great additions! Thanks for sharing!
Dennis Derringer
Even though this article is old, the information and instructions are time-less! I made mine using 3/4″ birch ply-wood and couldn’t be more pleased with the results! The $300 commercially available models have nothing over this! Thank you for the awesome design!
Dennis Derringer
Ron
I’m just finishing up one very similar to this.
However I set the arms at 120° apart and
Face glued two layers of birch plywood for the ring.
I’m using tee bolts and knobs instead of hex bolts and
Also found a set of replacement wheels and bearings at
sports authority. I used my router extensively on this project
To cut the circles and the ways for the arms, which are oak.
skip
Realizing that it’s been nearly 9 years since your original post, I just wanted to thank you for the excellent plans and photos. Many of my friends have made this steady rest, all work great. I made one minor modification to your design. I made the steady rest base a couple inches longer on one side (where the wingnuts are) so I could add a 2×2 at the junction of ring and the base, then glued and screwed the 2×2 to both. It simply provides more support to the rings.